Report: Work in Progress Detailed showing AR and Trust.
Note: for detailed instructions on customizing a report please see the Manage Reports document.
Comment: This is a great report. On the screen the summary is shown very nicely. But when I print it to a PDF it shows all the details. I don’t want that. How can I get this report in a PDF with just the summary and without all the details showing?
Customize: Go to REPORTS -> CONTACT -> LEDGER TAB.
Click on the “chevron” to show the “Ledger Options” screen;
From the View choose “wip+ar+trust” report;
Click on the “Manage Reports” in the bottom right corner of the screen;
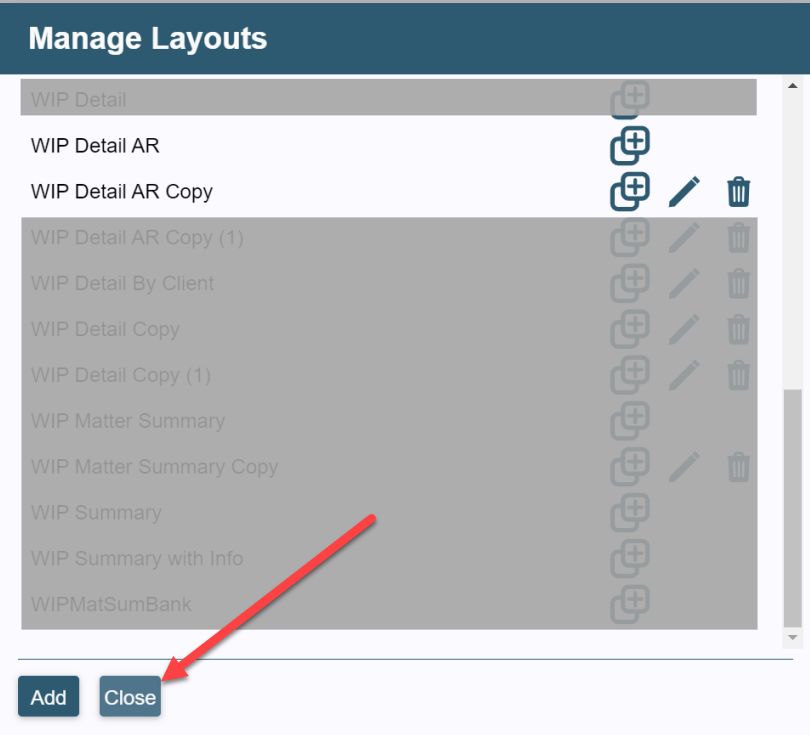
On the sub-screen “Manage Layouts”, make a copy of the “WIP Detail AR”;
Edit the copy using the “Pencil” icon.

Edit: Several screens will be displayed in Edit mode but only one change will need to be made for this customized report.
First Screen: Edit Layout, just click “Next” at the bottom left;
Second Screen: Edit Layout, turn off the “Ledger Entries”, press “Next” at the bottom left;

Third Screen: Ledger Heading Report, just click “Next” at the bottom left;
Forth Screen: Ledger Headings Page, just click “Next” at the bottom left;
Fifth Screen: Ledger Footer Page, just click “Next” at the bottom left;
Sixth Screen: Ledger Footer Report, just click “Next” at the bottom left;
Seventh (and final) Screen: Edit Layout – Summary, press “Save”;
Close the “Manage Reports” sub-screen using the “Close” button at the bottom.
Save View: Assign the new customized report to a View on the list of reports.
Click on the “Save View” button in the bottom right of the screen;
View: Type New Name of the View. It cannot be a name that already exists in the list;
Description: Enter a Description, this text will appear in the title of the Report;
Layout: Use the dropdown list and find the “copy” that was created earlier;
Make the View Public: This will allow the report to be available for others;
Press “OK” to save the view.

The new report will only show the summary rather than all the details on the PDF. Number of pages will be reduced.
Was this article helpful?
That’s Great!
Thank you for your feedback
Sorry! We couldn't be helpful
Thank you for your feedback
Feedback sent
We appreciate your effort and will try to fix the article